A few weeks ago I was having a chat with my buddy Alex about wax seals. I thought having such an item would be a fun prop for my weekly roleplaying game as well as neat little extra add on to the letters I write. We talked about the different designs one could order as a wax seal. I was pretty interested in having my first initial in a fancy font. Then Alex suggested I get the a custom made Autobot logo since I am such a Transformers fan. I thought the idea was pretty cool, but most places I saw on line that offered to make customer Wax Seals cost over a hundred dollars. That’s when Alex suggested a 3D printing service.
The cost to use 3D printing has come down so much in recent years that the common person can now afford to create the custom items he or she wants to fill the needs that they have. In this example, I will show you the steps to create a custom wax seal using 3D printing Technology. This process is now cheaper then having a 3rd party supplier of wax seals create one for you.
Wax seals were and still are used to this day for sealing envelopes and packages. Using a wax seal to seal a letter to a friend or family member will make receiving of that letter much more special. Wax seals can also be used as props in tabletop roleplaying games and as decorations.
So lets get started.
-

Autobot Logo
Step 1. You’ll Need A Design
You need a design that you want for your wax seal. In my case, I wanted the Transformers’ Autobot logo as my seal. A quick Google image search later and I found this guy. It was perfect for what I wanted. Obviously you could draw out your own unique design for the your seal if you want.
- Step 2. Vector Your Design.
There are several ways to do this and several apps that can do it. I am going to suggest InkScape because it is free. Download the program and install it. Then import your image and trace it. Once you have traced your image you can export it as a vector file (.SVG) to your computer.
- Step 3. Tinkercad
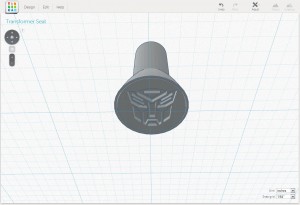 Using another free program (this time a web based application) called Tinkercad, you can create your wax seal in 3D for printing. Within Tinkercad you will have access to all kinds of shapes that you can combine to form more complex objects. You can do things like turn objects into “holes” which basically subtracts them from the object you’re building. The imported logo was made as a hole into the bottom of the face of the seal. To make the seal I
 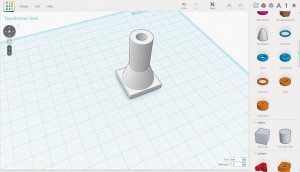 combined the tube with a paraboloid. The diameter of the round part, or the face of the seal, is 3/4 inch. All together the height of the seal is 1.188 inch.
- Step 4. Export To 3D Printer
When your 3D model is done in Tinkercad, you can then export your wax seal to one of a number of 3D printing services offered up through Tinkercad. I chose Shapewase for no good reason. I couldn’t tell you if one 3D printing service is better then the other. It was just the one I chose.
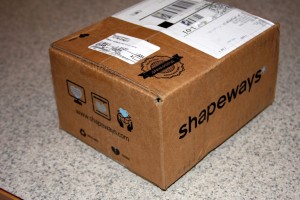 I had my seal 3D printed with plastic and it cost about $7. A Metal one would have costed around $35.00. Which is a lot less then having a custom made seal done by one of these internet stores that makes custom seals.
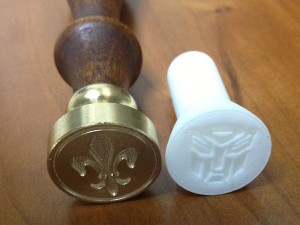
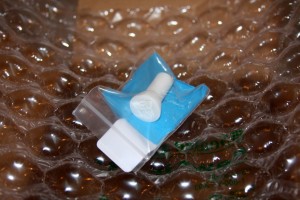 About a week later in the mail the Transformers Autobot seal I made arrived well packaged. The quality of the seal was great. I wasn’t sure what to expect, but I was impressed after holding it in my hand. The detail on of the Autobot logo is all there.
When I compare it to one of my other wax seals, I did notice that some of the lines on my 3D printed seal were a little finer. I started to question if the detail would get picked up in the wax impression. Only one way to find out.
- Step 5. Oil
Damp a paper towel with some kind of cooking oil and then press the seal down into the oil. This is going to keep the wax from sticking to the seal. Trust me this make the whole process a lot easier. If you don’t do this chances are you are going to spend a good half hour picking the wax from your seal with a tooth pick over your sink.
- Step 6. Using your seal
 Everything I have read about seal wax is that you want to use a flexible sealing wax. This stuff supposedly adheres to paper a lot better then normal candle wax (which is brittle) and can handle going through the post office. (Thought I do suggest you to some more research on this before you just start wax sealing all your correspondences.)
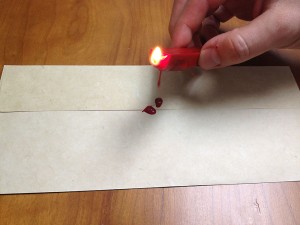
 Start by lighting the Flexible wax seal candle. Hold the stick of wax about and inch or two above the spot you want to seal. (When melting wax it’s very important not to touch the wax to the flame as it will start to burn and smoke.) Allow the heat of the flame to melt the wax, not the flame itself.
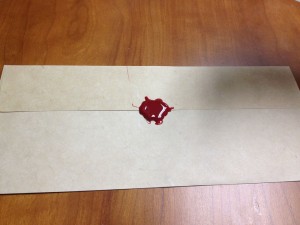
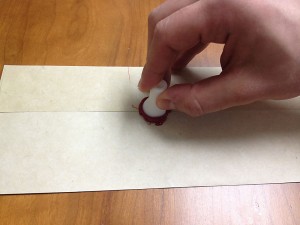
Let the wax drip on to the area you want to seal until you have about a nickel size pool of melted wax. Remove the seal from the oil soaked paper towel and press the seal directly on top of the wax for a few seconds.
Carefully remove the seal and allow to dry completely before touching it.
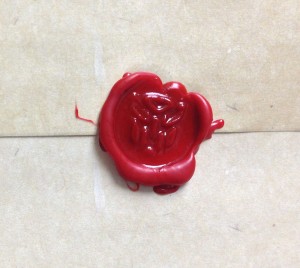
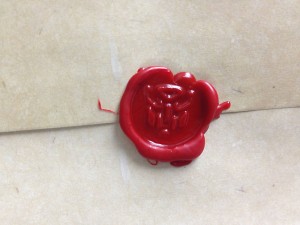
And there you have it. Your own custom wax seal. I was very impressed with out this project turned out, but like I feared the finer lines did not turn out. Lucky it’s hardly noticeable The ring around the Autobot logo and the two lines for the ears of the logo hardly came through at all. This could be fixed by making the whole logo a bit bigger.
Some Useful links:
Comments are closed.

Hi,
thank you very much!
Can you help me to make a seal?
I can pay you,please contact me
Best
Stefano
omg! this is the BEST!!! I just spent an hour picking wax out of my 3D printed seal for my wedding invites and – OIL!! Saved the day and now my seal actually works.
Thank you for posting this.
You’re welcome. Glad its working for you.
Please Help. I can’t get my svg file to upload properly to tinkercad. Everytime I upload it creates a small box that I can’t transform at all.. Could you please tell me what I’m may be doing wrong I’ve followed all of you steps to a T…
Not sure if I did something wrong but the cheapest they charge is $33. What kind of plastic do I order it on? https://tinkercad.com/things/fUbhPbLaUSa Here is the link to my Wax Stamp. Let me know if I did something wrong 🙂 thanks so much!
Also can I get this created with Sandstone? It is the cheapest so far 🙂 thanks!
How many grams does that weigh?
My library charges 10 cents a gram for 3d printing.
Much too complicated. I noticed that even people here are asking for help. It’s best to just have one made professionally.
Wax Seal tips is very good tips. I don’t know this wax seal use but I follow this blog very benefit. It is informative one!! Thanks for posting this blog.